
Excerpt from "The Shooter's Blueprint" Series
It's tempting to try and balance the overall exposure on this type of shot - but if you're exposing for the subject, it's pretty hard to accomplish!
Shooter's Blueprint
White Primary Subject on a Darker Background
The settings can always vary, but the chart below calls out the general scenario.

Unlike with a white on white subject, you will not be able to place the majority of the image into the right half of the histogram - you'll be using most of the range. Since you are exposing for a white subject, you will very well end op blocking out some of the dark elements in the scene - that is the compromise we'll need to make.
Blueprinter’s disclaimer – there is always more than one way to accomplish something, this just happens to be the way that works for me. All adjustment references are related to Apple Aperture software - other packages have similar adjustments.
Camera Setup:
- Exposure Program:Shutter Priority
- This is my preference with a subject that could start moving a little more a quickly, but Aperture Priority or Manual will certainly work.
- Shutter Speed: 1/750th
- Depends on lens and subject activity. For the sample image, I would not go below 1/750th of a second.
- ISO: The lower the better to keep the noise out of your darks
- Exposure Compensation:0 ev
- Take prep or sample shots to determine how far you can push it, but ideally, you don't want to clip any of the whites (you'll see in the original image below that I went just slightly over the line)
- Focus:AI Servo (Canon speak for continuous focus) with one focus point - varied selection depending on location of the swan and keeping the focal point on the eye
- This was my choice as I was very close and the subject was swimming around.
These settings resulted in the raw image below:
Original RAW Shot
Original Histogram

Post Processing:
- White balance: Adjusted for swan
- Recovery Slider: Adjusted to recover the few areas that were over exposed
- Black point:Left at base adjustment
- No need for an adjustment here due to dark background
- Definition Slider: Moderate adjustments (up to half way)
- Be careful not to blow any highlights out in the process
- Shadows Adjustment: Moderate to high adjustments here returning depth and detail
- Levels Adjustment:Basic adjustments as needed for accurate balance.
- Be careful of a blueish color cast bleeding over into the white's of the subject
- Sharpening: To personal taste and output goals
The adjustments above yielded the results below.
Final Image

Final Histogram

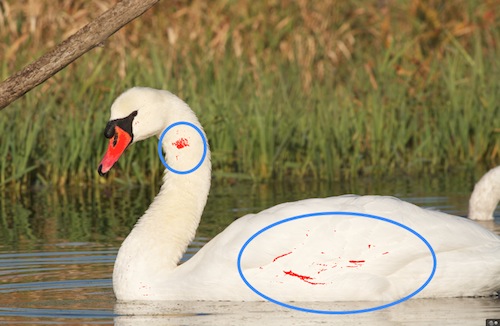
Your camera's dynamic range can't match our eyes - so with a contrasting subject like this we have to compromise. Ask yourself what is the most important element (obviously it's the swan here) but I had to sacrifice a little detail in the darker face to ensure I was able to keep detail in the feathers. The brighter the light, the more difficult this will be.
One Final Tip . . .
As mentioned in similar posts - don't attempt this type of shot with JPEG, this is a RAW only technique. JPEG will limit you and yield less than favorable results.
Have fun and stay in focus!
Mark