Tips

Why Shoot Raw?


Tree Swallow Singing

Tree Swallow Singing

The answer is easy for me - shooting in the camera's native ("raw") format rather than JPEG allows for a high degree of recovery when you "miss".  There are other reasons (ability to adjust white balance, use camera profiles after the fact, etc) but exposure recovery is number one for me.  The image below is the original raw file from the camera.

As shot - underexposed

As shot - underexposed

Big difference!  The first step in processing this image was to increase exposure 1.5 stops.  That's a lot!  There were some standard edits made as well (contrast, color, noise reduction and sharpening) but 90% of the change was the ability to pull the exposure out of the shadows.

Shoot in the raw, you won't regret it!

Stay in focus,

Mark
Aircraft Panning Basics


B65E7358

Panning Shots - The Practice is Worth it!

It takes practice and patience to develop a good panning technique, but the shots captured will make you proud.  Chances are you already have some of the basics down and just don't realize it.  Panning relies on good form and a steady motion - similar to a golf swing, skeet shooting and other activities.  Here are some quick tips to get you started:

Stance

  • Don't move your feet or your shoulders - pivot at your waist
  • Consider the arc of your pan, and face closer to your ending position - twist back to get to your starting point
  • This places what should be your best balanced position towards the end of your pan, allowing for better control
  • Holding technique

    • There are many ways to do this and not necessarily "one" right way - this is how I do it:
    • Press the camera against your face to increase stability.  A larger, cushioned eye-cup can make this more comfortable and effective
    • Tuck your elbows into your side, increasing stability
    • Lean slightly into your shot - this will create a more stable "triangle" between your face, front hand and tucked in elbows

    Settings

  • Checkout the article on Air Show Shutter Speed to learn more about proper settings and the different scenarios you will encounter
  • Shutter speed will be limited by your panning technique, with propeller driven aircraft requiring the most skill.  Begin your practicing with no lower than 1/750th of a second shutter speed and move down as you become comfortable
  • Spread your feet about should width apart - provides a stable platform and good balance
  •  

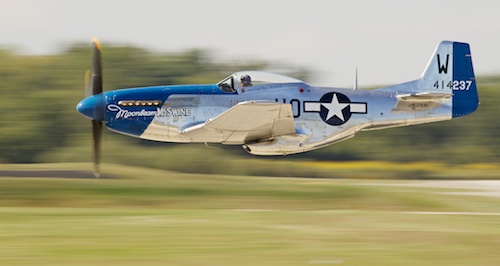
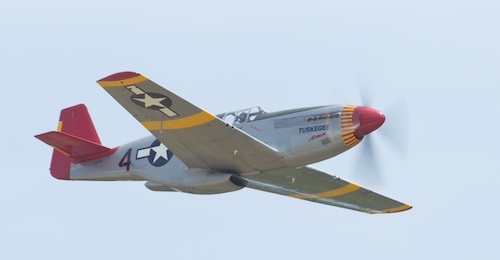
    P 51 Mustang<br /><br />
1 160th Shutter    and 200 MPH

    Select your target

  • While you can use multiple focus points, I've found it best to use the single point selection option - and lock it on target
  • Pick a spot on the aircraft, place your focus point of choice on it and keep it there (yes, easier said than done)
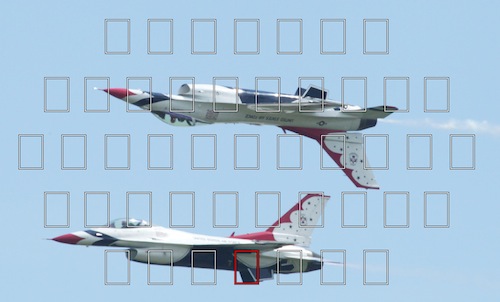
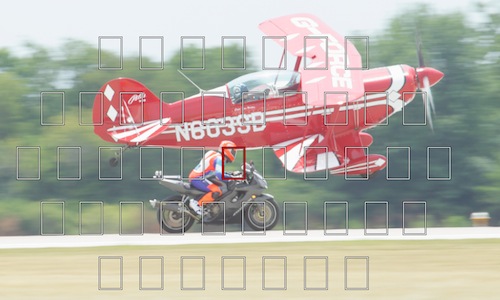
  • This doesn't have to be the center point.  As illustrated below, your target won't necessarily have a viable center spot
  • Aperture 1

    Aim and move

    • Depending on your target and the arc it's traveling, the speed will not be constant - you'll have to adjust with your target
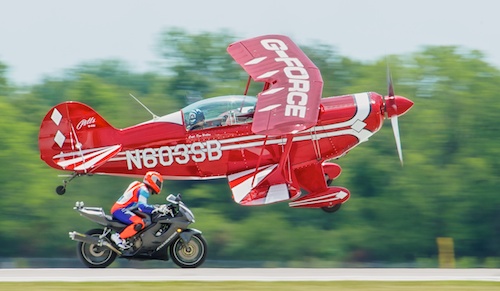
    • The bike shot below (shutter speed of 1/ 180th) was extra difficult as the bike and plane were not traveling at the same rate of speed for most of the run.  20 images yielded only one that was sharp enough.
    • The bike shot below (shutter speed of 1/ 180th) was extra difficult as the bike and plane were not traveling at the same rate of speed for most of the run.  20 images yielded only one that was sharp enough.
    • Once you've locked your focus point in place, practice your panning
    • Aperture 2

      Follow through

      • You want to shoot on continuous - as fast as your camera can go.  With practice you'll surely get better and have more "keepers" but even the best rarely achieve better than a 50/50 average keeper rate on difficult targets
      • Start early . . . end late
      • Begin your shooting sequence a second or two early - it will give you time to get the "rhythm" and allow your image stabilization to spin up
      • Use image stabilization?  Well, it depends.  Read up on your camera / lens.  Some systems have a special setting for image stabilization during panning
      • At the end of your series of shots, keep the motion going past the point of action.  You will naturally tend to slow down at the very end and you want to ensure you're still in rhythm when your last shutter click occurs
      Multi

       Practice

      • There really is no substitute for it, and it's amazing how much better your equipment seems to work when you practice!
      • Don't get discouraged.  Action shooting has a lot going on, focus on one issue at a time (panning, lower shutter speed captures, exposure, composition) and build up gradually.  Want to learn some other Air-show basics, check out this article from the beginning of the 2013 season.
      B65E8307

      Have fun and stay in focus!

      Mark

      Overexposed?? - No Problem (Part 3)

      We left off with last time in this series having completed exposure and recovery adjustments.  The next step is to selectively adjust only the highlights.  The easiest (90% of the time) way to do this is the Highlights and Shadows Adjustment sliders (as Aperture calls them).

      In this case, we obviously want to reduce the highlights, so that's the one we'll work with.  Pull the slider to the right and watch the preview.  It's takes a little bit of a feel to know how much is too much, but the general rule of thumb is to watch the mid-tones.

      Move the slider while watching your preview, as soon as you see the mid-tones of the image being impacted by the Highlights slider - stop.  Now back off the adjustment just a bit.

      Highlight Adjustment.jpg
      Highlight Adjustment.jpg

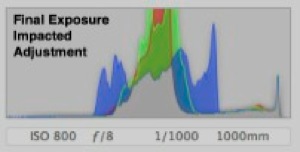
      The results can be significant, as the histogram below demonstrates.  Notice the better balanced readings, with nothing on the right edge.

      Ending Histogram.jpg
      Ending Histogram.jpg

      Compare that to the original histogram before we started with any adjustments.  Major improvement here overall - including a successful recovery of the blown out areas (Only RAW would allow you to accomplish this!

      Beginning Histogram.jpg
      Beginning Histogram.jpg

      And here is the final exposure result.  The only other adjustment made here was a slight tweak to the Black Point slider.  A usable and pleasing image has emerged from a shot that was destined for the trash can!

      5 - Black Point Adjustment.jpg
      5 - Black Point Adjustment.jpg

      Stay tuned . . . more tips to come in the week and months ahead, including one technique where we will actually straddle that right exposure limit - on purpose!

      Stay in Focus,

      Mark

      Overexposed?? - No Problem! (Part 2)

      The first step in this quick process starts with the Recovery Slider (Note, this is what Aperture calls it - other programs have similar functions with different names).  The key feature of this slider is that it's a "selective adjustment".

      ~A selective adjustment only impacts certain areas of the image, based on different criteria.  The Recovery slider selectively reduces exposure and allows recovery of only the most "blown out" areas of the image~

      The impact of this slider is significant as it pulls back the most overexposed elements of the image, beginning the process of recovering detail.  We then adjust our second slider, exposure.  Notice that we tweak this just about a third of a stop negative, to assist in our recovery.  Go easy on this slider, and only use it after you've gotten everything you can out of the Recovery Slider.  Exposure is a global adjustment, and will impact all areas of the image.

      Slider Adjustments
      Slider Adjustments

      At this point in the image, you can start to see the blown out areas begin to tone down - but it looks like we still have a long way to go (as you can see in the image blow, sampled after these two adjustments were made).

      Highlight and Exposure Adjusted
      Highlight and Exposure Adjusted

      Now, don't get discouraged yet!  Even though the image still shows a long way to go, look at how much improvement we've really made - as indicated by the histogram.

      Histogram after recovery and expsoure adjustments.
      Histogram after recovery and expsoure adjustments.

      So demonstrated progress has been made - and sets the foundation for everything else to come.  With the highlights themselves now properly recovered, we're ready to move on to the most visible corrective adjustment.  In Part 3 of this series we will focus on selectively recovering detail in the highlights - this is where the image really starts to "pop".

      Stay in Focus,

      Mark