Action

Aircraft Panning Basics


B65E7358

Panning Shots - The Practice is Worth it!

It takes practice and patience to develop a good panning technique, but the shots captured will make you proud.  Chances are you already have some of the basics down and just don't realize it.  Panning relies on good form and a steady motion - similar to a golf swing, skeet shooting and other activities.  Here are some quick tips to get you started:

Stance

  • Don't move your feet or your shoulders - pivot at your waist
  • Consider the arc of your pan, and face closer to your ending position - twist back to get to your starting point
  • This places what should be your best balanced position towards the end of your pan, allowing for better control
  • Holding technique

    • There are many ways to do this and not necessarily "one" right way - this is how I do it:
    • Press the camera against your face to increase stability.  A larger, cushioned eye-cup can make this more comfortable and effective
    • Tuck your elbows into your side, increasing stability
    • Lean slightly into your shot - this will create a more stable "triangle" between your face, front hand and tucked in elbows

    Settings
  • Checkout the article on Air Show Shutter Speed to learn more about proper settings and the different scenarios you will encounter
  • Shutter speed will be limited by your panning technique, with propeller driven aircraft requiring the most skill.  Begin your practicing with no lower than 1/750th of a second shutter speed and move down as you become comfortable
  • Spread your feet about should width apart - provides a stable platform and good balance
  •  

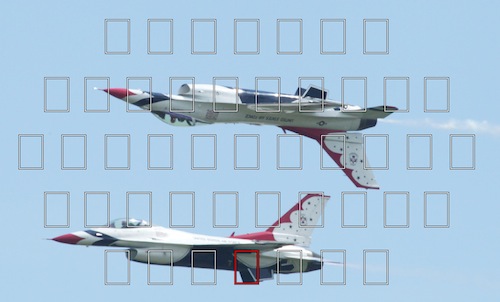
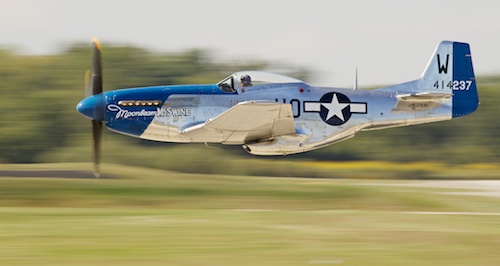
    P 51 Mustang<br /><br />
1 160th Shutter    and 200 MPH

    Select your target

  • While you can use multiple focus points, I've found it best to use the single point selection option - and lock it on target
  • Pick a spot on the aircraft, place your focus point of choice on it and keep it there (yes, easier said than done)
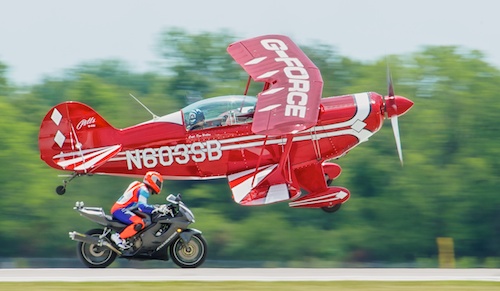
  • This doesn't have to be the center point.  As illustrated below, your target won't necessarily have a viable center spot
  • Aperture 1

    Aim and move

    • Depending on your target and the arc it's traveling, the speed will not be constant - you'll have to adjust with your target
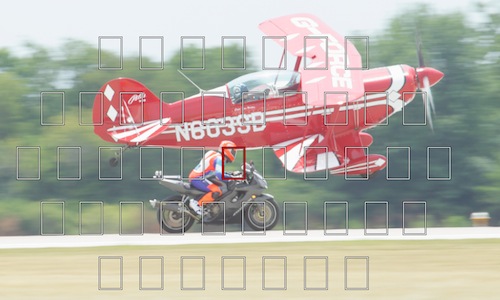
    • The bike shot below (shutter speed of 1/ 180th) was extra difficult as the bike and plane were not traveling at the same rate of speed for most of the run.  20 images yielded only one that was sharp enough.
    • The bike shot below (shutter speed of 1/ 180th) was extra difficult as the bike and plane were not traveling at the same rate of speed for most of the run.  20 images yielded only one that was sharp enough.
    • Once you've locked your focus point in place, practice your panning
    • Aperture 2

      Follow through

      • You want to shoot on continuous - as fast as your camera can go.  With practice you'll surely get better and have more "keepers" but even the best rarely achieve better than a 50/50 average keeper rate on difficult targets
      • Start early . . . end late
      • Begin your shooting sequence a second or two early - it will give you time to get the "rhythm" and allow your image stabilization to spin up
      • Use image stabilization?  Well, it depends.  Read up on your camera / lens.  Some systems have a special setting for image stabilization during panning
      • At the end of your series of shots, keep the motion going past the point of action.  You will naturally tend to slow down at the very end and you want to ensure you're still in rhythm when your last shutter click occurs
      Multi

       Practice

      • There really is no substitute for it, and it's amazing how much better your equipment seems to work when you practice!
      • Don't get discouraged.  Action shooting has a lot going on, focus on one issue at a time (panning, lower shutter speed captures, exposure, composition) and build up gradually.  Want to learn some other Air-show basics, check out this article from the beginning of the 2013 season.
      B65E8307

      Have fun and stay in focus!

      Mark

      White on White

      Excerpt from "The Shooter's Blueprint" Series MCT Vanity Owl

      I've received a lot of questions lately due to a guest post I did on Photographer Rick Sammon's Blog regarding capturing a white subject on a white background.  Especially with winter around the corner for some of us, I hope the tips below help.

      Shooter's Blueprint

      White Subject on White Background

      The settings will vary depending on what the exact scenario is, so let's use the parameters below.

      NewImage

      The trick to this shot is to expose as far to the right as you possibly can, without blowing any highlights out.  With a white subject, you want your data to be almost entirely in the right third of the histogram.  Anything less than that and your whites will start to look muddy, and correcting them will result in less than stellar results.

      Blueprinter’s disclaimer – there is always more than one way to accomplish something, this just happens to be the way that works for me.  All adjustment references are related to Apple Aperture software - other packages have similar adjustments.

      Camera Setup:

      • Exposure Program: Shutter Priority
        • Aperture is not an issue with this shot - there is only one subject and it is fairly far away.  (Depth of Field on this shot was around 1.5 feet)
      • Shutter Speed: For a moving subject, 1/1,000th is minimum - I chose 1/2,500th for these owl shots
      • ISO: 400
      • Exposure Compensation: 1.67ev
        • It's takes time to get a feel for this, just remember what you're trying to accomplish (exposing for the whites, as far to the right as you safely can and no blown highlights) takes practice.  It was a bright day and a lot of white in front of me - I started at 2.0ev and came down slightly after consulting my histogram. (oh yea, take test shots before the feathers start flying!)
      • Focus: AI Servo (Canon speak for continuous)
        • I used a cluster of focus points in the right of my frame as this owl was making his runs into the wind (right to left).  Using the right points allows me to leave room in front of the owl.
        • When focusing on a white subject, find some contrast to lock onto (that's how most focus systems work)  The Owl's upper chest with the dark bands was perfect and roughly on the same plane as his head and eyes.

      Original RAW Shot

      MCT Raw owl

      Original Histogram

      Raw histo

      Post Processing:

      • White balance: Tweaked slghtly
      • Black point: Adjustment cranked up about halfway
        • Just shy of blocking the dark claws
      • Definition Slider:Moderate adjustments (up to half way)
        • Be careful not to blow any highlights out in the process
      • Shadows Adjustment: Moderate to high adjustments here returning depth and detail
      • Levels Adjustment:Basic adjustments as needed for accurate balance.
        • Be careful of a blueish color cast bleeding over into the subject
      • Sharpening: To personal taste and output goals

      The adjustments above yielded the results below.

      Final Image

      MCT Final owl

      Final Histogram

      Final Histo 1

      Your digital sensor captures more detail in the right third of the histogram, so the goal here is to get as much of this "white" data in that area - without blowing any highlights - I know, it's a thin line to walk, but you can get ever closer to it with practice.  Post processing (Black Point, Definition and Shadows adjustments) then allows use of this maximum data to adjust as needed and end up with a great shot!

      One Final Tip . . .

      This technique is accomplished shooting raw - so don't go by the image on your camera's back screen as reference in the field (it will look washed out).  Rather make sure you didn't blow any highlights (no "blinkies" in your histogram) and create your final image in post.

      Have fun and stay in focus!

      Mark

      Learn Your Subject

      MCT 09 2011 09 16 2011 1 of 1

      The single best way to learn about your subject is to observe them for yourself.  Books and articles are a great start and help a bunch, but nothing takes the place of experiential learning - it tends to "stick" better this way, at least for me. Now, you may ask, "I'm a photographer, here to take a picture, why do I need to learn about . . . drag racing, birds, airplanes, etc?"  Well, first off, it can be a lot of fun - but from the photographer's perspective it can keep you from missing "the shot".  Let's take a look at an example.

      MCT 09 2011 09 19 2011 2 of 4

      Consider the Egret above.  As I've mentioned before, action photography can be boring - and the morning watching this egret was no different.  Now, having observed these animals before, I knew the following points (which helped me find a egret in the first place)

      • It is common for these animals to hang out for long periods of time at sources of moving water, where it is shallow enough for them to walk.  Gently moving water at the edge of a river or stream is another favorite place (as it was for the egret in the vanity image at the beginning of this article)
      • When they lock in on a breakfast target, they move very fast.  If your camera isn't already at your eye, it's easy to miss most of the action.

      This fellow stood in the same spot for a good 40 minutes, moving his head around, but not much else.  Now, since I was hand holding, keeping the camera at my eye was a non-starter.  Heck, even with a tripod I probably wouldn't be scoping him out every minute.  Ok, so we're faced with a conundrum . . . we know these guys move fast when the time comes, but it can take 40 minutes or longer before something happens - how do we know when to get the shot?


      MCT 09 2011 09 19 2011 1 of 4

      He's where the benefits of observation come in.  Notice in the image above that the egret has leaned his head slightly forward and is looking down - something has caught his attention.  It's a subtle move, but I knew from observation that it indicated a "target" was located. (Hint, bring your camera to your eye now).  At this point, one of three things is likely to happen:

      • It could be a false alarm or the fish moved away
        • The egret's head will move back to a more straightened posture
      • The target is close, and within reach of a strike
        • Thrusting his head in the water, a fish becomes breakfast
      • It's a good target, but requires repositioning.  With the head still focused down, a step or two is taken before a strike.
        • Example in the image below.

      MCT 09 2011 09 19 2011 3 of 4


      If you've been paying attention (and not watching the ducks take a bath), you'll have enough time to deliberately bring the camera to your eye, focus and check your settings.  You're ready if a strike happens.

      MCT 09 2011 09 19 2011 4 of 4

      From strike, until the fish slides down the throat, can take only seconds.  So if you're not ready, chances are you'll miss the shot all together - or get a shot off - but it's out of focus as you had to move too fast.

      So take some time and get to know your animal subjects (same thing goes for any other subject, really).  It's a great thing to do later in the day when you've lost the light anyway.  And here's another tip, what you learn about one subject can usually benefit you with others.  As the shot below indicates, Great Blue Herons hunt in a very similar fashion, long periods of standing around looking, and about 10 seconds of pure action.

      MCT 09 2011 09 19 2011 1 of 1

      I've noticed that Blue Herons will strike more quickly (you don't usually have a bent neck as a tip off) and more aggressively - often spearing the target with their beaks.  What an amazing thing to watch!

      Mark

      Luck Favor's the Prepared!

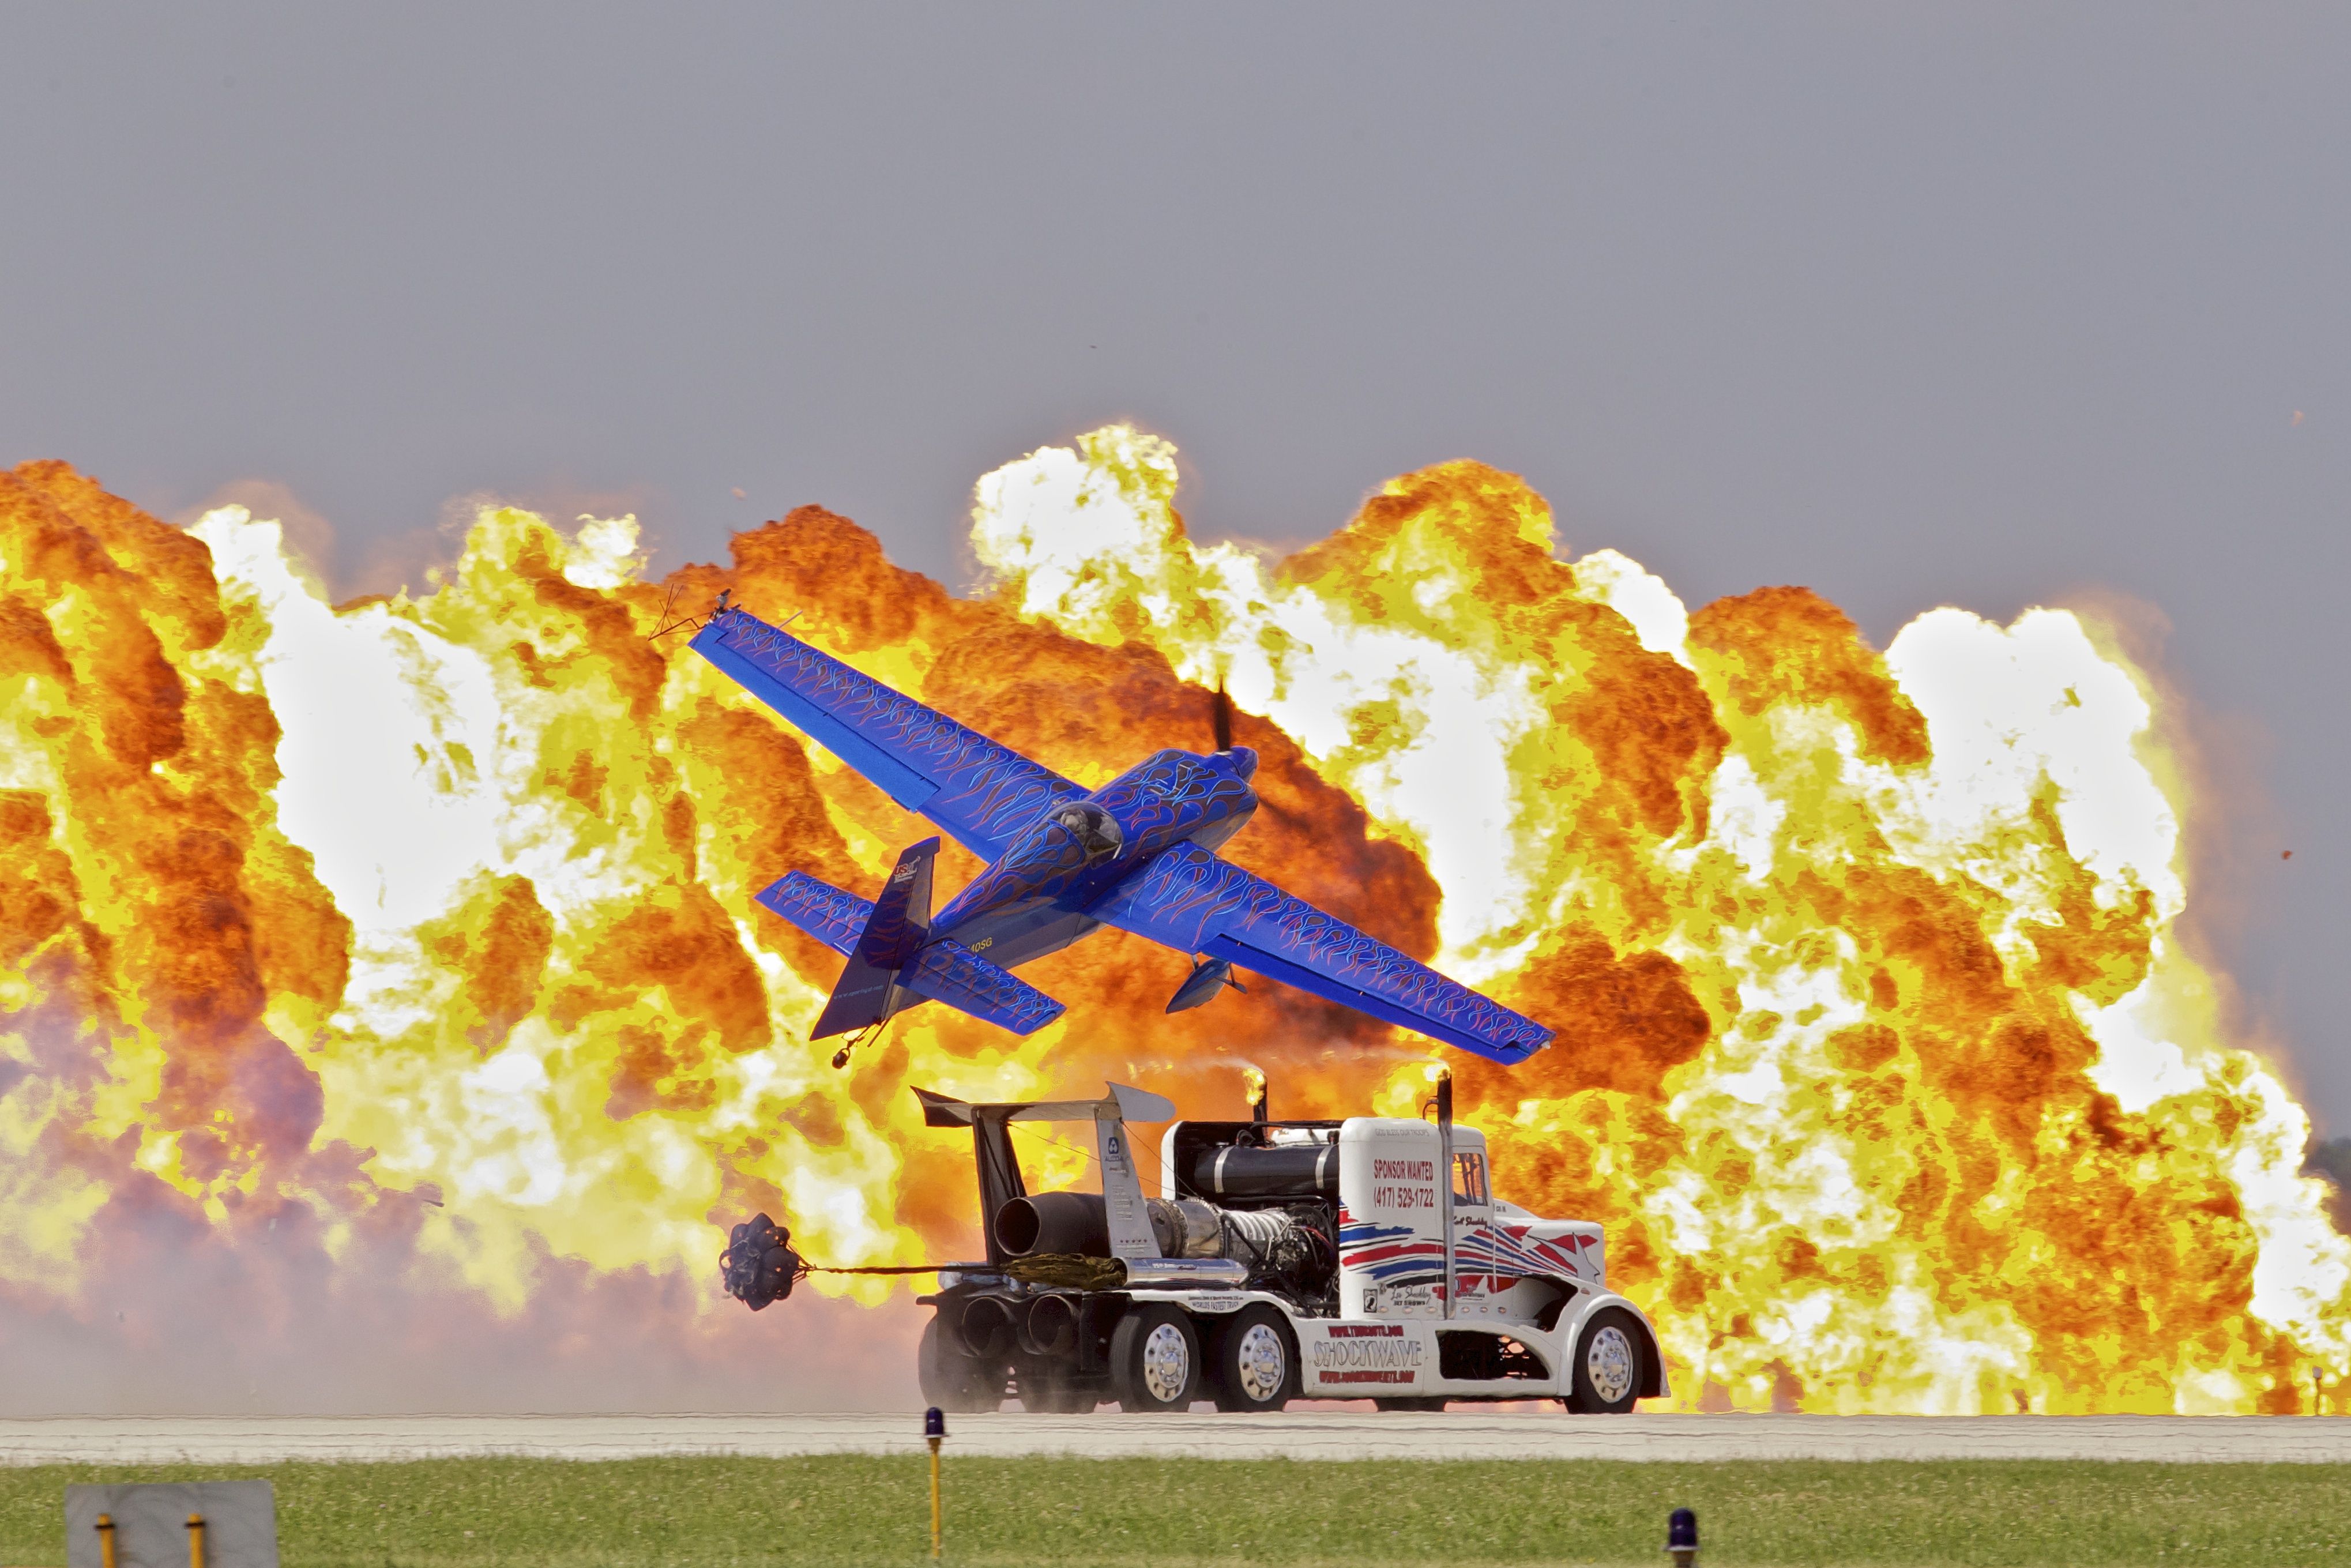
      [caption id="attachment_77" align="alignnone" width="432" caption="Truck vs Plane"][/caption] I made the picture above at a recent air-show and posted it on my Flickr stream. I got a very nice complement from a gentleman that was also at the show - "Great example of what can happen when preparation meets opportunity. Fun shot !" As I read this, I thought to myself "preparation nothing - this was all luck!". But then I started to think about it, he was right - a year ago, this would have been all luck but that wasn't the case any longer.

      I knew going into the show what the conditions were (where the sun and shadows would be) and I mentally made note of what exposure compensation might be needed as I transitioned from a sky shot to a ground shot. Heck, I was a little prepared! I also used the camera settings below which worked out pretty well:

      • Shutter Priority (around 1/750th for prop aircraft and 1/1500th or above for everything else)
      • I didn't want my depth of field to narrow so I set my minimum aperture at f/11 to ensure I maintained better DOF.
      • I sent my ISO on auto with the ability to max out at 3200
      • Finally, I did adjust my exposure compensation during shooting to match the conditions, anywhere from +.25 to +1.5

      So yes, I was prepared this time around . . . . . and very lucky I was panning with the plane for this shot!

      You can check out some of the other shots here.