We left off with last time in this series having completed exposure and recovery adjustments. The next step is to selectively adjust only the highlights. The easiest (90% of the time) way to do this is the Highlights and Shadows Adjustment sliders (as Aperture calls them).
In this case, we obviously want to reduce the highlights, so that's the one we'll work with. Pull the slider to the right and watch the preview. It's takes a little bit of a feel to know how much is too much, but the general rule of thumb is to watch the mid-tones.
Move the slider while watching your preview, as soon as you see the mid-tones of the image being impacted by the Highlights slider - stop. Now back off the adjustment just a bit.
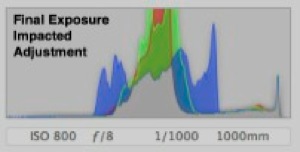
The results can be significant, as the histogram below demonstrates. Notice the better balanced readings, with nothing on the right edge.
Compare that to the original histogram before we started with any adjustments. Major improvement here overall - including a successful recovery of the blown out areas (Only RAW would allow you to accomplish this!
And here is the final exposure result. The only other adjustment made here was a slight tweak to the Black Point slider. A usable and pleasing image has emerged from a shot that was destined for the trash can!
Stay tuned . . . more tips to come in the week and months ahead, including one technique where we will actually straddle that right exposure limit - on purpose!
Stay in Focus,
Mark


